Manage Workflows
The Manage Workflows page lets you create automated approval flows for trip requests based on customizable rules. Workflows can include trip categories, departments, vehicle types, and priority levels, ensuring requests reach the right approvers. Each request is routed automatically according to predefined criteria, and multiple approvers can be assigned at each stage to prevent bottlenecks. All actions and decisions are tracked, providing a transparent audit trail for improved accountability.
Navigate to Manage Workflows Page
-
Click Settings icon on the left.
-
Go to Manage Workflows.
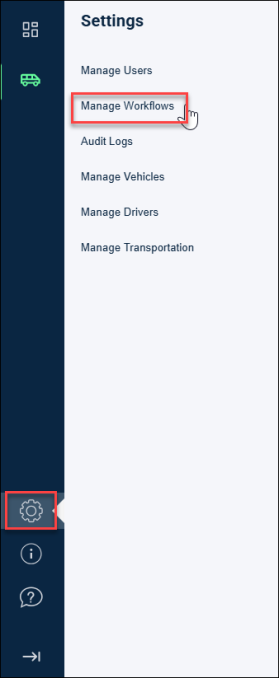
The Manage Workflows page appears.
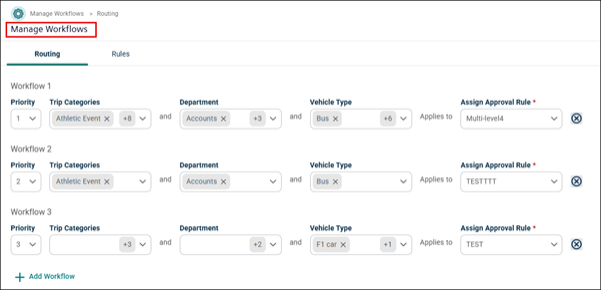
Workflow Components
Priority
Priority defines where this workflow stands relative to other workflows. Lower numbers indicate higher priority as the workflows are evaluated in order of priority.
This feature ensures that when multiple workflows match the same trip request, only the workflow with the highest priority (lower number) executes. Users can manually set priorities when creating or editing workflows, and the system prevents duplicate priority assignments to avoid conflicts.
For example, if in Tip Category a Sports Event is selected for 1st priority and All option is selected for 2nd priority, then any new trip request related to Sports Event will be redirected to the 1st priority. Though the Sports Event is common in both the priority the 1st priority has lower number and thus system redirects the trip through it.

Trip Categories
The trip categories help choose trip types to target specific scenarios. You can add multiple categories.

Department
It defines the relevant departments to which the workflow applies. Multiple departments can be included in a workflow.

Vehicle Type
It specifies the vehicle type to be included in the workflow. Multiple vehicle types are supported.

NOTE If any of the trip categories, department or vehicle types are not required for approvals, then leave it blank.
Assign Approval Rule
It specifies the approval rule that is applied to requests that match this workflow. This approval rules are set in the Manage Approval tab prior to assigning any workflow.

NOTE If no approval rule exists, then go to the Manage approvals tab and create a approval rule. Steps to create an approval rule are here.
Adding a Workflow
-
To add a workflow, click Add Workflow button at the bottom.
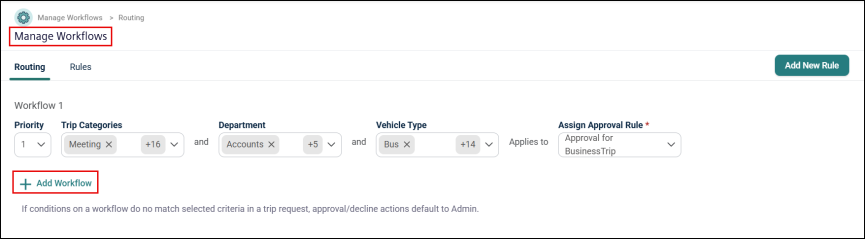
A row with all the fields for a new workflow will appear on the screen.

-
Enter a number to determine workflow order in Priority drop-down.
-
Choose one or more Trip Categories in Trip Categories drop-down.
-
Select the Departments using the drop-down.
-
Add the specific vehicles this workflow should cover in the Vehicle Type drop-down.
-
Choose the rule that governs the approvals for this workflow in the Assign Approval Rule drop-down.
-
Once all the fields are selected the workflow is saved automatically.
Delete a Workflow
-
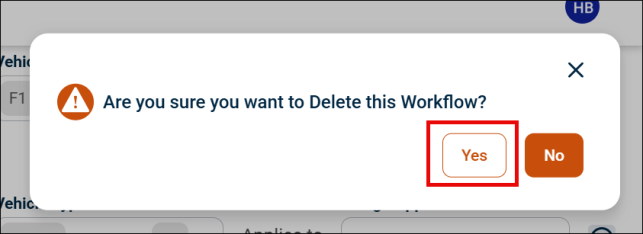
To remove a workflow, click the X icon on the right side of the workflow row.
-
A pop-up will appear on the screen, click Yes to delete the workflow.
Important Tips
-
Make sure to first create approval rules that fit your business needs in the Manage Approvals tab.
-
Always check the priority order—requests will be matched starting from the lowest priority number.
-
To edit a workflow or add more categories, departments, or vehicle types to existing workflow, just select the items from drop-down. The new settings will be applied to future trip requests.
Approval Rule
Approval rules streamline the approval process and automatically route trip requests to the dedicated assigned approvers based on the predefined rules, such as department or vehicle type. Multiple approvers can be assigned at each level, ensuring requests do not get stuck if one approver is unavailable. All approval actions are tracked, providing a clear audit trail for transparency and accountability.
Create an Approval Rule
Perform the below steps to create a new Approval Rule:
-
Click on Rules.
-
Click Add New Rule button at the upper right corner of the page.
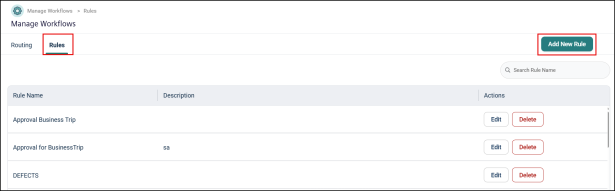
An Approval Flow side panel appears.
-
In the side popup window Approval Flow enter the following information.
-
Enter the Rule name in the Name field.
NOTE Make sure the name should not exceed 25 characters.
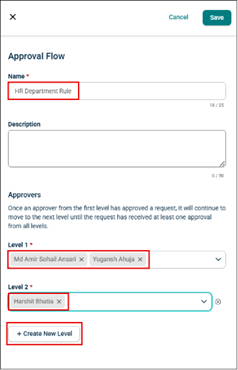
Optionally, enter a Description to describe the Rule.
-
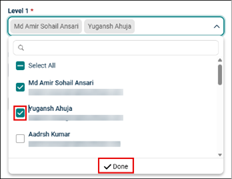
Enter and select the approvers from the Level 1 and Level 2 drop-down lists, then click Done.
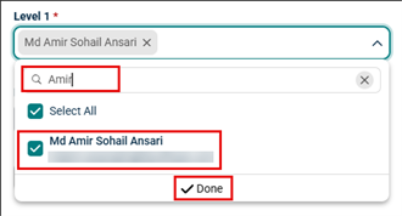
NOTE The request moves to the next level only if at least one approver from the previous level approves it.
-
User can add Multiple approvers in each level.
-
Click Create New Level button to add a new level approver.
NOTE Maximum of 5 levels of approvers can be created.
-
Edit and Manage the Approval Rules
Users can edit, delete, and manage the approval from Manage Approvals landing page.
-
Enter a rule name in the search bar located at the upper right corner of the page.

The matching rule name will appear at the top of the list.
-
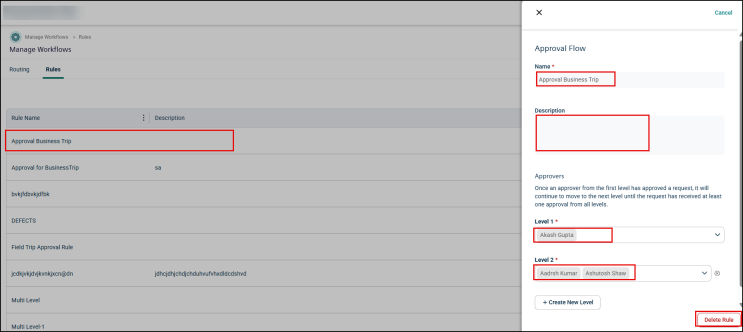
Click the rule name or Edit button to modify it.
An Approval Flow side panel appears.
-
Click on the Name field to make changes in the rule name.
-
Optionally, enter a description to the Description field.
-
Click Level 1 or Level 2 drop-down list, then select or clear the checkbox to add or remove the approvers.
-
Click Done.
-
Click Delete Rule to remove the rules.
